

When I first started smoking briskets years ago, I thought the cooking was the hard part. Then I ruined a perfectly smoked brisket with bad slicing technique. After learning from pit masters in Texas and experimenting with dozens of briskets in my backyard, I discovered that proper slicing is just as important as the cooking itself.
Great slicing technique can make a good brisket incredible, while poor technique can turn even a perfectly smoked brisket into tough, dry meat.
Understanding Brisket Structure Before Slicing

A whole brisket (called a "packer brisket") actually contains two different muscles: the flat and the point. These muscles run in different directions, which is why knowing how to slice each section properly matters so much.
The flat is the leaner, thinner section that makes up most of the brisket. The point is the thicker, fattier section that sits on top of part of the flat. Each needs to be sliced differently for the best texture and tenderness.
What You Need For Brisket Slicing
Before you start slicing, make sure you have these tools ready:
-
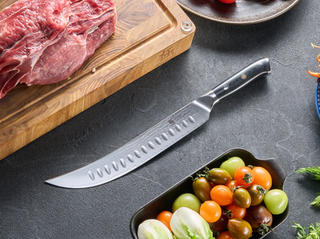
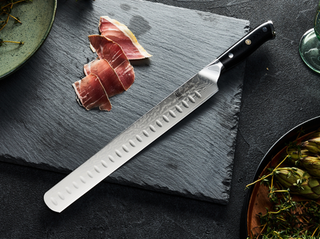
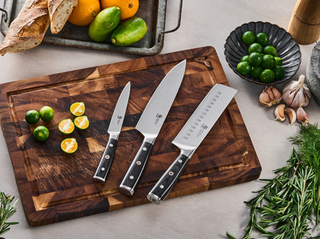
A long, sharp knife - A 12-inch slicing knife works great. I use the Kyoku brisket slicing knife because it's long enough to slice across the whole brisket width in one stroke.
-
Heat-resistant gloves - Put cotton gloves under your nitrile gloves to protect your hands from the hot meat.
-
Large cutting board - You need plenty of space to handle a whole brisket.
-
Serving platter - Have this ready before you start slicing.
4 Steps To Slice the Brisket

Step 1. Positioning the Brisket
-
Let your brisket rest for at least 30 minutes (ideally 1 hour) after cooking. This allows the juices to redistribute through the meat.
-
Place the brisket on your cutting board with the point end on your right and the flat on your left (reverse this if you're left-handed).
-
The fat side can be either up or down - it's your preference. I usually place it fat-side down for more stability while cutting.
Step 2. Separating the Point from the Flat
-
Find where the point and flat meet - there's usually a visible seam of fat between them.
-
Gently rest your left hand on the flat section and place your knife to the right of your hand.
-
Using a gentle sawing motion, slice down to the board along this seam. Be careful not to upset the bark on top or drag through the bark on the bottom.
-
Slice a chunk off the "hump" (the side of the point opposite what some call the "Mohawk").
Step 3. Slicing the Point Section
-
Identify the direction of the grain in the point section (the muscle fibers).
-
Slice AGAINST the grain into roughly 1/2-inch slices. This is thicker than the flat because the point has more fat and can handle thicker slices while remaining tender.
-
Alternatively, you can cube the point section to make burnt ends - a Kansas City specialty!
Step 4. Slicing the Flat Section
-
Look carefully at the flat to identify the direction of the grain.
-
Slice against the grain into roughly 1/4-inch slices. The flat is leaner, so thinner slices help it stay tender.
-
Only slice what you plan to serve immediately. The meat starts to dry out once sliced.

Common Brisket Slicing Mistakes to Avoid
When I was learning to slice brisket, I made plenty of mistakes. Here are the big ones to avoid:
-
Slicing with the grain instead of against it. This creates tough, stringy meat that's hard to chew.
-
Slicing everything the same thickness. The flat and point need different treatment.
-
Slicing too much at once. Only slice what you'll eat right away.
-
Using a dull knife. This tears the meat and ruins the bark.
-
Not letting the brisket rest before slicing. This causes all the juices to spill out, leaving dry meat.
Expert Tips for Better Brisket Results
Over the years of smoking and slicing briskets, I've picked up some tricks that make a huge difference:
-
If your brisket feels too firm while slicing, it might be undercooked. You can wrap it and return it to the smoker or oven.
-
The "bend test" helps check doneness - properly cooked brisket should bend easily without breaking.
-
For presentation, arrange your slices on a platter with the bark side visible.
-
Save any juices that collect while slicing and pour them over the meat before serving.
-
Keep sliced brisket covered with foil to stay warm and moist until serving.
Serving Your Perfectly Sliced Brisket
Traditional Texas-style brisket is served simply - maybe with some white bread, pickles, and onions on the side. Sauce is optional and often served on the side. In some regions, brisket is served with a variety of sides like mac and cheese, beans, or coleslaw.
The USDA's food safety guidelines recommend serving hot foods at 140°F or above. If you're not serving the brisket immediately after slicing, keep it warm in an oven or insulated container.
Conclusion

Slicing a brisket properly might seem like a small detail, but it makes all the difference between tough, dry meat and melt-in-your-mouth barbecue. (I learned this lesson the hard way after spending 14 hours smoking my first brisket, only to ruin it with improper slicing technique.)
The key is: always slice against the grain, cut the flat and point differently, use a sharp knife, and only slice what you'll eat right away. Master these basics, and you'll be serving competition-worthy brisket at your next backyard barbecue.
Take your time, respect the meat, and you'll be rewarded with brisket that makes people ask for your secrets.

